Sunday 27 July 2014

Pumpkin Soup


Pumpkin soup
Pumpkin soup


Pumpkin belongs to the family of squash and there are numerous varieties of pumpkin all over the world. Pumpkin is found in practically every country of the world. Winter squash is also a pumpkin but it assumes a variety of names depending on the locality in which it is grown. In the United States, pumpkin pie is a traditional part of Thanksgiving meals. Halloween lanterns may also be made from pumpkins. The bright orange color of the pumpkin indicates the presence of carotenoids including alpha and beta carotenes. Our body coverts beta carotene into Vitamin A. Beta carotene is an antioxidant that helps prevent cancer risk. Lutein is also present in the pumpkin.
Sliced pumpkin
Sliced pumpkin

Pumpkin is rich in fibre and therefore it is easily filling and makes people to eat less. It is helpful to the weight watchers. Pumpkin seeds contain phytosterols which help in lowering bad cholesterol. After a hard day’s work, pumpkin soup will restore energy and boost the mood. Pumpkin also boosts the immune system.


                                  Recipe summary
                                             For
                                     Pumpkin soup    

Preparation  time: 15 minutes
Cooking time:30 minutes
Serves : 4
                                              

1. Wash and peel 200 grams pumpkin. Slice into 1/2 inch size pieces.


2. In a large saucepan bring water to the boil and add pumpkin slices. boil covered for about 15 minutes in medium heat or until the pumpkin becomes soft.


Pumpkin soup
Pumpkin soup


3. Take off the heat and let it cool for about 15 minutes.

Puree the pumpkin slices with the water from the pan.


4. Add the puree back to the saucepan. 

Check the liquid for consistency.


5.  Add coconut milk and 1 teaspoon salt, 1/4 teaspoon  pepper and 1/4 teaspoon  thyme.


6.Bring to the boil and take it off the heat. Taste for seasoning and adjust.

The pumpkin soup is ready.
                                                          
                   Recipe follows in detail with pictures.
                                               
                                                   
Preparation  time: 15 minutes
Cooking time:30 minutes
Serves : 4

Ingredients

Main

200 grams pumpkin
Others
1 teaspoon salt
1/4 teaspoon pepper
1/2 cup coconut milk
1/4 teaspoon dried 
thyme
3 cups water

Preparation

Wash and peel pumpkin. Slice into 1/2 inch size pieces.

Method

In a large saucepan bring water to the boil and add pumpkin slices. boil covered for about 15 minutes in medium heat or until the pumpkin becomes soft.
Take off the heat and let it cool for about 15 minutes.
Puree the pumpkin slices with the water from the pan.
Add the puree back to the saucepan.
Check the liquid for consistency if it is too thick add some water. If it is too thin boil it further to bring it to the right consistency.
When you are satisfied with the consistancy add coconut milk and salt, pepper and thyme.
Bring to the boil and take it off the heat. Taste for seasoning and adjust.
The pumpkin soup is ready.


Nutrition data for this recipe
Nutrition content is computed by adding nutrition values of individual ingredients according to the USDA nutrition database. Water shown here is what is found in the ingredients and not the water added while cooking. This is only an approximation. For further information please read my post “
Nutrition information for my recipes.
 Click the button below to view the nutrition data. Click again to close it.

Saturday 26 July 2014

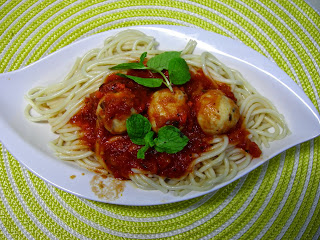
Spaghetti with mushroom balls

Spaghetti with mushroom balls
 Spaghetti is an Italian word meaning “little twine”.  Spaghetti is long, thin, and round pasta. The word pasta in Italian means paste. In Italy it is required under the law to make spaghetti out of durum wheat semolina. Durum is a kind of very hard wheat that is high in protein content. Spaghetti dough has high elasticity and therefore can be molded into various shapes. These shapes are retained even when it is cooked. Outside Italy spaghetti may be made from wheat flour or semolina.

Today I am going to make a spaghetti dish with some mushroom  balls. This recipe is easy to make because all the ingredients are store bought. Mushroom balls are as tasty as meat or fish balls. This has all the nutrition of the mushroom


Spaghetti before boiling


                               Recipe summary
                                          For
                     Spaghetti with mushroom balls

Preparation time: 10 minutes
Cooking time: 50 minutes

Serves: 4
Ingredients

1.In a large pan heat 1 liter of water. When the water comes to a boil add a table spoon of  oil , salt and  250grams spaghetti and cover the pot partially. Reduce the heat and let it simmer for about 45 minutes. When it is adequately cooked to your liking, take off the heat and strain.

2. I bought cooked 200 grams mushroom balls. If the mushroom balls were not cooked you will have to boil it for fifteen minutes.

Spaghetti with mushroom balls
Spaghetti with 
mushroom balls


3. In a medium saucepan heat up the 400 grams spaghetti sauce and when it boils add the  mushroom balls leave for 5 minutes.


 The spaghetti sauce is ready. 
                                        
                            Recipe follows in detail with pictures.


Preparation time: 10 minutes
Cooking time: 50 minutes
Serves: 4

Ingredients

Ingredients for Spaghetti with mushroom balls
Ingredients for Spaghetti with mushroom balls

Main
250 grams of dry spaghetti noodles
400 gram spaghetti sauce
200 grams mushroom balls
1 Table spoon vegetable oil
salt 1 teaspoon

Preparation

In a large pan heat 1 liter of water. When the water comes to a boil add a table spoon of  oil , salt and the spaghetti and cover the pot partially. Reduce the heat and let it simmer for about 45 minutes.  Italians prefer spaghetti slightly under cooked and firm to bite. They refer to this as al dente – firm to bite. Under cooked spaghetti has slightly lower glycemic index than fully cooked. You will have to test it after 30 minutes and see if it is adequately cooked. When it is adequately cooked to your liking, take off the heat and strain.

Cooking time of spaghetti varies according to the type of wheat used. Durum wheat spaghetti will take longer to cook than spaghetti made of all purpose flour. Read the instructions given in the package.

Freshly made spaghetti – not dry- is also available. This is more expensive and you have to cook it the same day.

I bought cooked mushroom balls. If the mushroom balls were not cooked you will have to boil it for fifteen minutes.


Method

In a medium saucepan heat up the spaghetti sauce and when it boils add the  mushroom balls leave for 5 minutes. The spaghetti sauce is ready. .
Spaghetti with mushroom balls


Serve while the spaghetti and the sauce are still hot.

Nutrition data for this recipe
Nutrition content is computed by adding nutrition values of individual ingredients according to the USDA nutrition database. Water shown here is what is found in the ingredients and not the water added while cooking. This is only an approximation. For further information please read my post “
Nutrition information for my recipes.

 Click the button below to view the nutrition data. Click again to close it.


Friday 25 July 2014

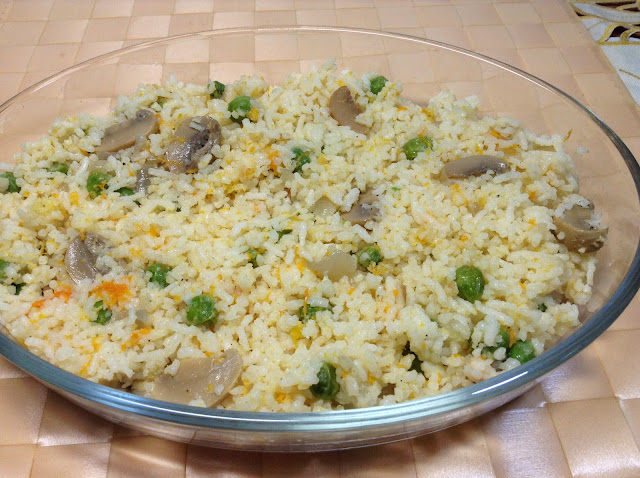
Butternut squash fried rice ( vegetarian)

This dish is very much like the baked butternut squash rice. Instead of baking the rice we are going to fry it. This is slightly easier and quicker than the baked rice but without any sacrifice in the taste. I want to keep this as a vegetarian dish.
Butternut squash fried rice
Butternut squash fried rice

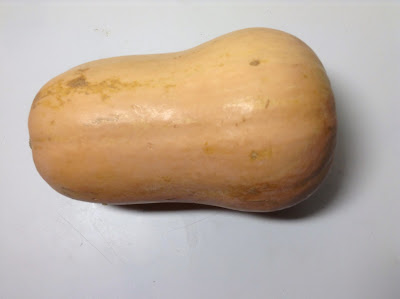
Butternut squash tastes very much like pumpkin.  Therefore you can also cook it like pumpkin and substitute it for pumpkin in most of the recipes.


                                     Recipe summary
                                               For
                              Butternut squash fried rice

Preparation time: 1 hour 30 minutes
Cooking time: 30 minutes

Serves: 4


Butternut squash
Butternut squash 

1. Cut the 300 grams squash into two halves. Discard the seeds and the stalk. Cover the baking dish with two baking papers and place the squash in the baking tray.The first sheet will help you to turn the baked quash and the other will help in cleaning  at the end.
Bake the squash for 45 minutes at 200 degrees centigrade. This was a small squash. A bigger squash would have taken about 1 hour. 

2. Let the squash cool and then scoop out all of the flesh leaving only the skin. Chop the the vegetable. 

3. Heat 3 table spoon vegetable oil in a frying pan or a wok. When the oil is hot reduce the heat to low and add 1 onion coarsely chopped and fry for 5 minutes.
Ingredients

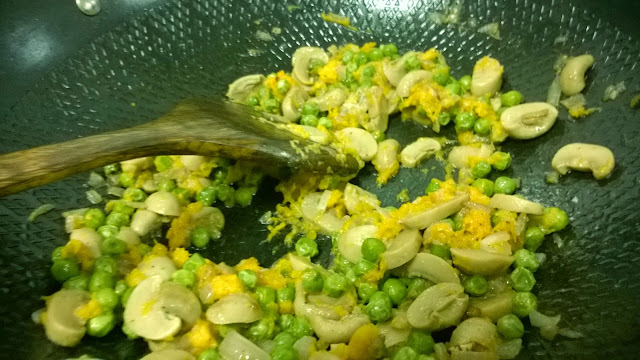
4. Add 3 cloves garlic, 100 grams of button mushrooms sliced thinly and 100 grams green peas and fry for another 5 minutes. 

5. Add 3 cups of cooked rice, 4 tablespoon coconut milk and stir well and fry for another five minutes.  Sweetness from the squash is furthered by addition coconut milk.

6.Add ½ teaspoon salt and ¼ teaspoon of black pepper powder.
Butternut squash fried rice
Butternut squash
 fried rice


7. In the end this will be a slightly sweet dish. Children will love it.

Those want hot food can take this with some cut chilies in soy sauce and some vinegar.
The fried rice is ready. It is a full meal on its own

Note:

If you don’t want a vegetarian dish you can scramble two eggs and add to the rice when frying. It will make the fried rice tastier.quash in to small pieces.


                       Recipe follows in detail with pictures.


Preparation time: 1 hour 30 minutes
Cooking time: 30 minutes
Serves: 4
Butternut squash
Butternut squash 


Ingredients

Ingredients for Butternut squash fried rice ( vegetarian)
Ingredients for Butternut squash fried rice ( vegetarian)

Main
1 butternut squash 300 grams
3 cups cooked rice
Others
1 onion coarsely chopped
100 grams green peas
100 grams of button mushrooms sliced thinly
3 cloves garlic
4 tablespoon of coconut milk
½ teaspoon salt
¼ teaspoon of black pepper powder
3 table spoon vegetable oil
Onion, mushroom and peas and butternut squash are being fried


Preparation

Cut the squash into two halves. Discard the seeds and the stalk. Cover the baking dish with two baking papers and place the squash in the baking tray.The first sheet will help you to turn the baked quash and the other will help in cleaning  at the end. Bake the squash for 45 minutes at 200 degrees centigrade. This was a small squash. A bigger squash would have taken about 1 hour. Let the squash cool and then scoop out all of the flesh leaving only the skin. Chop the squash in to small pieces.

All ingredients are being fried


Method

Heat the vegetable oil in a frying pan or a wok. When the oil is hot reduce the heat to low and add onion and fry for 5 minutes.

Add garlic, button mushroom and green peas and fry for another 5 minutes. Add the cooked rice coconut milk and stir well and fry for another five minutes. The rice should retain a little moisture and should not change color. Sweetness from the squash is furthered by addition coconut milk. .Add ½ teaspoon salt and ¼ teaspoon of black pepper powder. In the end this will be a slightly sweet dish. Children will love it.

Those want hot food can take this with some cut chilies in soy sauce and some vinegar.
The fried rice is ready. It is a full meal on its own

Note:

If you don’t want a vegetarian dish you can scramble two eggs and add to the rice when frying. It will make the fried rice tastier.

Nutrition data for this recipe
Nutrition content is computed by adding nutrition values of individual ingredients according to the USDA nutrition database. Water shown here is what is found in the ingredients and not the water added while cooking. This is only an approximation. For further information please read my post “
Nutrition information for my recipes.

 Click the button below to view the nutrition data. Click again to close it.


Wednesday 23 July 2014

Butternut squash baked rice ( vegetarian)

Butternut squash is a seasonal vegetable. It is a versatile vegetable that can be used in salads, soups, pizzas and add to vegetable juice.. When buying, you should look for one which is heavy for its size and has smooth and uniform skin. This squash can be stored up to 3 months in a cool and dry place without refrigeration.
Butternut squash baked rice
Butternut squash baked rice

Today I am going to bake this squash. This recipe requires extra bit of work but it is worth the effort. This is not a spicy dish. We are not going to add any spice other than pepper and salt.

This is a vegetarian dish.


                                   Recipe summary 
                                              For
                  Butternut squash baked rice ( vegetarian)

Preparation time : one hour 30 minutes. Baking takes 45 minutes to an hour.
Cooking time: 30 minutes

Serves: 2

1. Cut the 300 grams squash into two halves. Remove the seeds. Cover the buttered baking tray with two sheets of  baking paper. This will make cleaning easy at the end. Place the squash on the baking tray and bake at oven temperature of 200 degrees centigrade for 45 minutes. Bigger squash would take about 1 hour.
Butternut squash
Butternut squash 

2. After baking let it cool for about 10 minutes. Lift the first sheet of paper underneath and turn it over to turn the squash. 

Now scoop out about half of the orange flesh. In a small sauce pan mix the squash flesh just scooped out, with 1 table spoon of coconut milk, ¼ teaspoon of salt and ¼ teaspoon of pepper powder and put it on medium heat and cook for one minute. Set the saucepan aside and let it cool.

3. In a frying pan or a wok add 2 table spoon vegetable oil and heat it. When the oil gets hot lower the heat and add 1 onion coarsely chopped and fry for 5 minutes. 

4. Add 30 grams green peas and 30 grams of button mushrooms sliced thinly and fry for another 5 minutes. 
Ingredients

5. Add the reserved squash flesh, stir and fry for two minutes. Now add the cooked rice and remaining 1 tablespoon coconut milk and ¼ tea spoon of salt,  and stir well. Fry for two minutes and take off the heat.

6. Now fill the squash shell lying on the 
Butternut squash baked rice
Butternut squash
 baked rice

tray (after scooping out the flesh) with the rice mix. Top it with the 30 grams cheese. And bake again for 5 to 10 minutes or till the cheese melts. You can bake it till the cheese browns. I don’t like the cheese to brown so I will remove the squash as soon as the cheese melts.

Try this dish  it is not difficult.

Baked butternut squash rice is ready. 


                  Recipe follows in detail with pictures.


Preparation time : one hour 30 minutes. Baking takes 45 minutes to an hour.
Cooking time: 30 minutes
Serves: 2

Butternut squash
Butternut squash 
Ingredients

Ingredients for Butternut squash baked rice ( vegetarian)
Ingredients for Butternut squash baked rice ( vegetarian)

Main
1 butternut squash 300 grams
1 cup cooked rice
Others
1 onion coarsely chopped
30 grams green peas
30 grams of button mushrooms sliced thinly
3 cloves garlic
½ teaspoon salt
¼ teaspoon black pepper powder
3 tablespoon of coconut milk
30 grams of cheese of your choice
2 table spoon vegetable oil

Preparation

Cut the squash into two halves. Remove the seeds. Cover the buttered baking tray with two sheets of  baking paper. This will make cleaning easy at the end. Place the squash on the baking tray and bake at oven temperature of 200 degrees centigrade for 45 minutes. Bigger squash would take about 1 hour.
Butternut squash on the baking tray


After baking let it cool for about 10 minutes. Lift the first sheet of paper underneath and turn it over to turn the squash. Now scoop out about half of the orange flesh. In a small sauce pan mix the squash flesh just scooped out, with 1 table spoon of coconut milk, ¼ teaspoon of salt and ¼ teaspoon of pepper powder and put it on medium heat and cook for one minute. Set the saucepan aside and let it cool.


Method 

In a frying pan or a wok add the vegetable oil and heat it. When the oil gets hot lower the heat and add onion and fry for 5 minutes. Add green peas and mushroom and fry for another 5 minutes. Add the reserved squash flesh, stir and fry for two minutes. Now add the cooked rice and remaining coconut milk and ¼ tea spoon of salt and stir well. Fry for two minutes and take off the heat.

Now fill the squash shell lying on the tray (after scooping out the flesh) with the rice mix. 
Baked butternut squash filled with rice


Top it with the cheese.


Cheese spread on the rice

 And bake again for 5 to 10 minutes or till the cheese melts. You can bake it till the cheese browns. I don’t like the cheese to brown so I will remove the squash as soon as the cheese melts.

Baked butternut squash rice is ready. Try this dish  it is not difficult.

Nutrition data for this recipe
Nutrition content is computed by adding nutrition values of individual ingredients according to the USDA nutrition database. Water shown here is what is found in the ingredients and not the water added while cooking. This is only an approximation. For further information please read my post “
Nutrition information for my recipes.

 Click the button below to view the nutrition data. Click again to close it.


Monday 21 July 2014

Spicy Fried Canned Corned Beef

When you have some left over rice, bread or flat bread and you are in a hurry canned corned beef will come in handy to prepare a quick and easy accompaniment. Today I am going to make it very spicy (hot) but you can leave out the chilies and chili powder to make it milder.


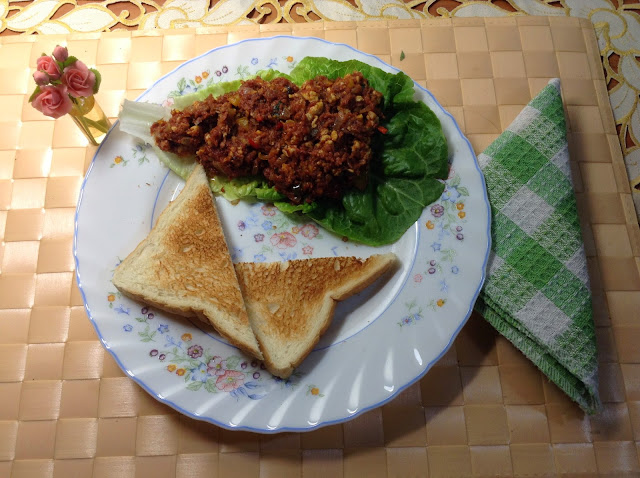
Fried corned beef with bread
Fried corned beef with bread


Recipe summary
                                                 For
                           Spicy Fried Canned Corned Beef

preparation Time :30 minutes
cooking time: 30 minutes

Serves: 4

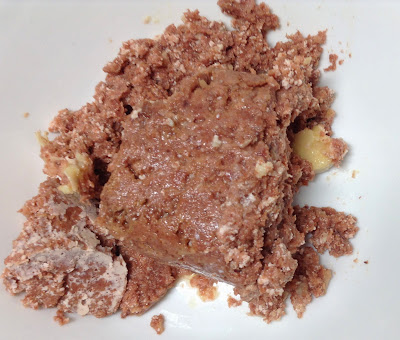
1. Crumble 1 can corned beef in a medium size bowl 
Can of corned beef
Can of corned beef


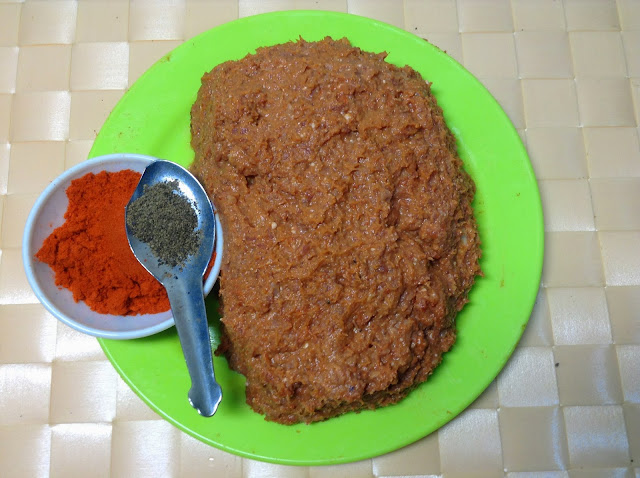
2. Mix with ½ teaspoon chili powder (optional) and ¼ teaspoon black pepper powder, ½ teaspoon salt if needed  and set aside.

3. Heat  2 tablespoon vegetable oil in a frying pan or a wok. Lower the heat and add 5 grams ginger finely sliced and fry for 30 seconds.

4. Add 1 onion coarsely chopped and fry for 5 minutes.

5. Add 3 cloves garlic sliced coarsely, 1 green chili and 1 red chili finely chopped and fry for 2 minutes.
Ingredients
6. Add 1 celery stalk, 1 yellow bell pepper, 10 curry leaves finely chopped, 1 large tomato coarsely chopped,  and fry for another 7 minutes to let the tomato lose some of its moisture.
Fried corned beef with bread
Fried corned beef 
with bread


7. Create a well in the center of the pan or wok by moving the ingredients to the sides. Break 2 eggs into the center. Stir and let the eggs scramble for three minutes. When the egg pieces harden mix all the ingredients together.


8. Add the corned beef mix and fry for 4 minutes or till the corned beef gets the fried taste.

Fried corned beef is ready. Serve with rice or bread.


Spicy Fried Canned Corned Beef is ready.
                                  

 Recipe follows in detail with pictures.


preparation Time :30 minutes
cooking time: 30 minutes
Serves: 4

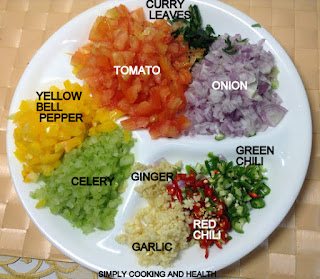
Ingredients

Ingredients for Spicy Fried Canned Corned Beef
Ingredients for Spicy Fried Canned Corned Beef

Main
1 can of corned beef
2 eggs
Others
1 celery stalk finely chopped
1 yellow bell pepper finely chopped
1 large tomato coarsely chopped
10 curry leaves finely chopped
1 onion coarsely chopped
3 cloves garlic sliced coarsely
5 grams ginger finely sliced
1 green chili finely chopped
1 red chili finely chopped
½teaspoon salt
2 tablespoon vegetable oil
Spices
½ teaspoon chili powder
¼ teaspoon black pepper powder

Can of corned beef
Can of corned beef


Preparation

Corned Beef
Corned beef
Crumble corned beef in a medium size bowl and mix with chili powder and pepper powder and set aside. You can leave out the chili powder if you cannot take spicy hot stuff.
Corned beef mixed with pepper and chili powder


Method

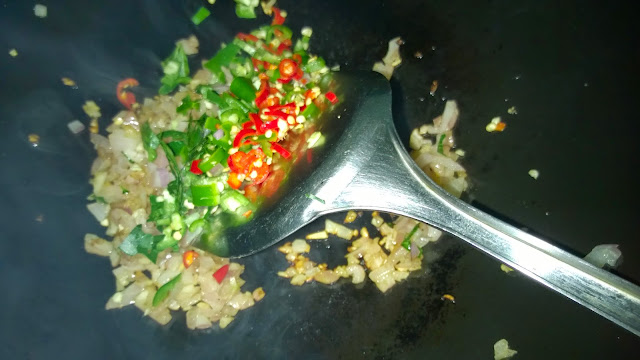
Heat the vegetable oil in a frying pan or a wok. Lower the heat and add ginger and fry for 30 seconds then add onion and fry for 5 minutes. Add garlic, green chili and red chili and fry for 2 minutes.


Green and red chili added to the onion

Add celery, bell pepper, tomato and curry leaves and fry for another 7 minutes to let the tomato lose some of its moisture.


Celery added to the mixture

Bell pepper added to the mixture

Tomato added to the mixture

Create a well in the center of the pan or wok by moving the ingredients to the sides. Break the eggs into the center. Stir and let the eggs scramble for three minutes. When the egg pieces harden mix all the ingredients together.


Clear the center like this and break the eggs in it.
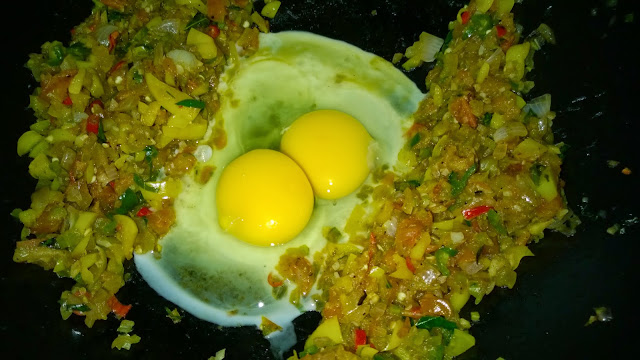


Let the egg fry and harden

Now mix all the ingredients together

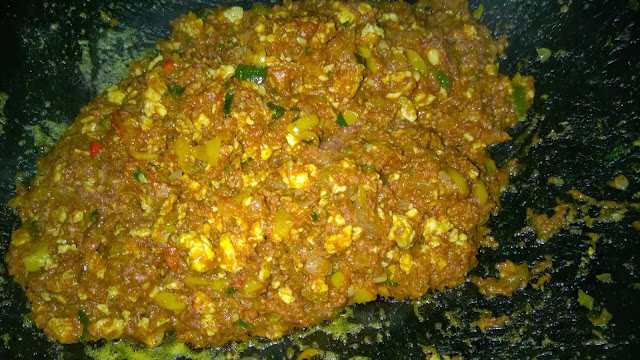
Add the corned beef mix and fry for 4 minutes or till the corned beef gets the fried taste.


Now add corned beef mix and fry

Fried corned beef is ready. Serve with rice or bread.


Now fry everything together
Fried corned beef is ready. Serve with rice or bread.

Note: When you are frying green and red chili slices the vapors from the pan or wok will irritate your nose and throat. If you cannot take it leave the chilies out.

If you cannot take spicy hot food, leave out the green and red chilies and chili powder. If you can take a little spicy food include the chili powder. This finished dish will not be that hot as we are adding some vegetables and eggs to extend the quantity.

Nutrition data for this recipe
Nutrition content is computed by adding nutrition values of individual ingredients according to the USDA nutrition database. Water shown here is what is found in the ingredients and not the water added while cooking. This is only an approximation. For further information please read my post “
Nutrition information for my recipes.

 Click the button below to view the nutrition data. Click again to close it.