Wednesday, 28 January 2015

Detoxification

Vegetables
Vegetables
The environment we live in is polluted by chemical, biological, and photolytic processes. The toxins from these pollutants accumulate in the environment and in human and animal bodies.  Some of these toxins came from fertilizers, pesticides, insecticides, and herbicides used in cultivation. These pollutants can remain in the environment for decades causing problems such as cancer, birth defects, learning disabilities, immunological, behavioral, neurological and reproductive disorders in humans and animals.

The toxins in the body may consist of arsenic, lead and mercury.

A detoxification (detox for short) program is undertaken to eliminate toxins from the system. Liver and kidneys are naturally endowed with capability of eliminating toxins. In many cases the toxin is the system is more than what the liver and kidney can eliminate. Then bio accumulation of toxins sets in.

Fruits
Fruits

Generally it is good to go through a simple detoxification program once a year. This will ensure that you will not accumulate heavy metals in your system.
Unexplained fatigue, sluggish elimination, skin irritation, allergies, minor infections, eye bags, bloating, menstrual problems and mental confusion may indicate that you may need detoxification. These are very general symptoms and could be for various other conditions as well. Blood and urine tests will reveal heavy metal deposits in your system. Then you will need to go through a cleansing program.

Probiotics
Probiotics

Mercury Poisoning

This is one of the heavy metal poisoning of human body.  All river fishes and most large ocean fish, such as shark, tuna and swordfish, contribute to the mercury build up in human body. Using coal to heat homes also could cause increase in mercury consumption. Amalgam, a form of tooth filling, also contributes to increase in mercury levels.
Mercury will be found in blood and in tissues. It concentrates in fatty tissues, especially in the brain, which is made mostly of fat.

How to detect mercury in your system

This is done by challenge or provocation test with doctor’s prescription. Usually 500 mg of DMPS (Dimercaptopropanesulfonic acid (pronounced dye-mer-cap-toe-pro-pain-sull-fon-ic acid))  in one dose first thing in the morning after you empty your bladder. Thereafter you collect urine for the next 6 hour period.

DMPS is a chelating agent, which means that it binds to metals such as mercury, lead and arsenic and forms stable complexes with these metals, so that they will be eliminated from the body. DMPS is water soluble. In oral administration more than 50% of DMPS is absorbed by the body. DMPS is water soluble and about 90% of it eliminated through the kidneys. It was developed in Russia in the 1950s and has since been used in Europe.  Usually DMPS treatment will be for a period of 30 days and a patient will consume about 4 grams of DMPS during this period. At the end of 30 day period, a urine test will be done and if high level of mercury is indicated then the medication will be continued for another 30 day period. This may go up to about 5 months. In most cases the first month of detoxification will suffice. In medical literature it has been reported that 4 ½ was the longest period during this treatment was administered. Side effects may include skin reactions such as itching, rash, urticaria, nausea, dizziness, fever, weakness, skin reactions, mucous membrane reactions, shivering and fever. But these are said to be mild.

Extra virgin olive oil

DMPS is not approved by FDA and therefore is not available in the US. The reasons for non-approval by FDA could be that DMPS may pull out some useful metals such as zinc and copper. Secondly it could also dump large quantities of mercury in the liver and kidneys which could result in damage to these organs.  Instead of DMPS the doctors in US will prescribe DMSA (Dimercaptosuccinic acid) which is FDA approved but removes lot less mercury than DMPS. For the challenge test you will take about 30mg/kg. For treatment you will take 100 to 250mg capsule three times a day before meals for 3 days then take 11 days off. This treatment will continue for 6 months after which you will do the urine test.

During the treatment you may be advised to take vitamin B and C, glutathione and phospholipids to boost the detoxification process. Regular bowel movement and intake of plenty of water will also help.  Powdered flax seed will help in improving bowel movement. If you do not have at two bowel movements a day, you may end up reabsorbing some of the eliminated mercury from the gut.

Lead Poisoning

Lead poisoning occurs when large amount of heavy metal lead is in the body.  Lead is poisonous to many organs and tissues such as heart, kidneys, bones, reproductive and nervous systems.
Air, water, soil, food, and consumer products are the main sources of lead accumulation. In adults lead accumulation may be due to occupational exposure. Lead is used in soldering. It is also found in storage batteries.
Simplest way to test for lead is to find out the amount of lead circulating in the blood. This may not reveal the total amount of lead stored in the body, but it gives a starting point.
Lead in blood level is expressed as micro grams per deciliter (µg/dl), or micro grams per 100 grams (µg/100 g).
According to the Centers for Disease Control (US) has stated that in adults 10 µg/dl of the whole blood is elevated blood lead level. For children this is much lower at 5 µg/dl of blood.
Symptoms of lead poisoning are headaches, constipation and difficulty in sleeping, vomiting, seizures etc. These are very general and may be due to various other reasons. Therefore it is not possible to diagnose lead poisoning based on symptoms. It is good to get tested for lead poisoning.
Vegetable juic
Vegetable juice

Detox programs

Detox programs for mercury and lead poisoning are administered by doctors.

The World Wide Web abounds with detox programs which many scientist call as wastage of money and time. There is little or no scientific evidence of the effectiveness of the programs. Many research studies on these programs are inconclusive or contradictory.

So we have to rely on our common sense to identify some foods and practices that will help in the elimination of toxins from our body.

Some medical practitioners who are treating toxins have written about their treatments. This would be a good lead. Some scientists have published their findings on individual research. This could give us another lead. For example Dr. Mercola says that sleep is critical for brain detoxification.( Sleep Is Critical for Brain Detoxification, Ground-breaking Research Finds)
Peanuts
Peanut


Niacin detox

Niacin is a water soluble Vitamin B. It has the ability to dilate blood vessels, improve blood circulation and also decrease cholesterol levels. Toxins are deposited in the fatty tissues. Niacin is able to send blood supply to the fatty tissues through minor capillaries and thus able to flush out toxins.
Niacin therapy is administered by doctors and may be supplemented with sauna, exercise, activated carbon and weight loss.
Mung bean
Mung bean
Master Cleanse is a general purpose detoxification program. It uses laxatives, salt water flush and a simple drink taken early in the morning. The drink consists of lemon juice, honey, cayenne pepper and water.
Humble garlic or cilantro may also be effective in eliminating heavy metal from our body.

Some common cleansing programs

1. Exercise is an excellent way of eliminating toxins from your body.
2. Drinking plenty of water will eliminate toxins with urine.
3. Take lemon juice early in the morning.
4. Eat plenty of raw vegetables and fruits. The fiber in them will help in eliminating toxins.
5. Daily 15 minutes of meditation will eliminate stress and keep your body free from toxins.
6. Dry brushing and sauna will help to release skin toxins.
7. Take Vitamin C.
8.  Avoid alcohol, dairy, sugar and coffee.
9. Eat fresh fish.
10. Take unsalted nuts, seeds and legumes.
11. Take extra virgin olive oil and apple cider vinegar.
12. Take garlic, ginger and pepper.
13. Take honey.
14. Take vegetable juice daily. Try juice fasting for a day or two.
15. Take probiotics to get rid of the bad bacteria.

Do not try any of the above if you are pregnant or breast feeding. Some of the dieting and beauty programs include detoxification as a part of the therapy. It is always good to consult you doctor before you attempt on any detoxification program.


Friday, 23 January 2015

Scrambled wheat flour with shredded coconut (Puttu or Pittu)


The steamed pittu
The steamed  pittu


Serves: 4
Preparation time: 30 minutes
Cooking time: 5 to 7 minutes


Scrambled flour steamer
 In this preparation you make dough  out of steamed wheat flour and crumble it into small pellets or balls and steam it. 
This dish can be made out of any kind of flour such as all purpose flour, whole meal wheat flour, rice flour, whole meal rice flour, finger millet flour and almost any ground cereal. Probably brown rice flour is the healthiest but diabetics will prefer finger millet flour. But all purpose wheat flour is the tastiest for this dish.


Pittu
Today I am going to make a dish where wheat flour is crumbled and steamed with shredded coconut. We always eat baked bread. This is going to be some kind of steamed bread. This resembles couscous in texture.

Things we need
A puttu steamer
Or simple steamer
A food processor
A roller pin to push the pittu out.

Steamed all purpose  flour
Steamed all purpose flour


Ingredients for my recipe
3 cups steamed flour
1 cup scraped coconut
1½ cups water
1 teaspoon salt


Shredded coconut
Shredded coconut

Preparation

Take out two or three tablespoon of flour and set it aside. Put the flour in a food processor add salt and do the pulse once or twice. Boil water in a kettle and keep. Now add about 1 cup of hot water through the spout and do the pulse couple of times.and run on speed one to form granules for one minute. If the flour forms into small granules now you are on the right track. Now run the food processor for 30 seconds. If you have something like this you are done.


This is the correct texture.

But if the granules are two small and in flour form you can add one or two table spoon of water and repeat the process of pulse and running the processor.

If the water is excessive it will form big balls like lumps. you will get something like this
or even like this

Using a food processor to scramble the flour. The flour is too lumpy.

Then you add some flour in stages and pulse the processor couple of times the dough will break down into small crumbles
if you run the machine flour will become a dough. If it becomes a dough remove it from the processor and break using the hands.put half or  quarter of the dough back into the machine
Then you add some flour in stages and pulse the processor couple of times the dough will break down into small crumbles. The size of the crumbles can vary and it will not make any difference in the taste. But the crumbles should be smaller than ¼ of an inch and ideally closer to 1/8 of an inch. Add water to make the crumbles bigger and add flour to make the crumbles smaller. If you take your time and do it you cannot go wrong.
When you get the size of the crumbles to your liking then you are done.

Put the crumbled flour into a steamer and add one table spoon of grated coconut.
Our next step is to steam the crumbles. You can steam it in any kind of steamer such as electric steamer, pressure cooker etc.

I will show you the traditional steamer first and then an ordinary steamer.
Take barrel of the steamer and insert the bottom piece with the holes in it. Position this stopper with your fingers from the bottom of the barrel.


The parts of the steamer

Fill the bottom kettle with water up to half or slightly less. Put the empty barrel on top of the kettle. Let it heat up on the stove. It will fit snuggly and prevent wastage of steam. 
In three to four minutes time you will see steam coming out from the top of the barrel. After the steam comes out from the top wait for about 10 seconds to let the steam get moment and fill the barrel. Reduce  heat. Remove the barrel  with oven gloves and keep on a plate.
Add one table spoon of scrapped coconut as the first layer in the barrel. This will prevent the crumbles from blocking the holes. The steam will pass through easily. Then add two table spoons of crumbles followed by one table spoon of scrapped coconut. Each time you add coconut or crumbles spread it out with the handle of a spatula or something similar. Repeat until the barrel is full. See that you finish with coconut. Then cover with the lid of the barrel. Bring it back to the heated kettle with boiling water.

Increase the heat.  Within 5 to 8 minutes you will see the steam from the top with a smell of steamed flour.
Then quickly remove the barrel from the kettle using oven gloves and remove the lid and using the roller pin
from back of the barrel push the pittu to a plate slowly as shown in the picture.

You will need a roller pin or a long handled spoon to push the pittu out to a plate


Pushing the pittu out of  the steamer using the roller pin
Pushing the pittu out of  the steamer using the roller pin

Repeat the process until you have used up all the crumbles.
The cooked pittu will look like this.

Next I will show you a much easier way of steaming. Here I will use this steamer.


Simple steamer
Spread the scrapped coconut at the bottom of the upper pan of the steamer. Take out about 3 table spoon of coconut and mix the balance with the crumbles gently with a fork. Add the remaining coconut on top and spread out evenly. Cover the pan with the lid.
Add water up to one quarter of the bottom pan and bring the water to the boil. In 5 to 6 minutes you will see team coming out from the top lid. Wait for about 20 seconds and remove the cooked pittu from the bottom pan. You are done.
The cooked pittu will look like this.
Cooked pittu by using the simple steamer


Puttu can be eaten with sambol

This is a traditional food common in South India and Sri Lanka. It is also called pittu or puttu and is eaten usually for breakfast or dinner. It can be eaten with sambol, curry, fried egg or even butter and sugar.

Level - 3
Making of pittu looks  difficult but if you try you can make it. Making the crumble needs a little practice.
Medium level of work is needed.  It is not simple either. You can steam the flour ahead and keep in the refrigerator in an air tight container in hot climate.  You can keep for a month.  If you keep out you will see fungus in the container in few days. In cold climate you can just keep outside in a container.

Scrambled wheat flour with moringa leaves and coconut

Pittu with moringa leaves

Here is another variation of the above recipe.

Only additional ingredient you will need is 50 grams of moringa leaves. Wash and dry moringa leaves.

moringa leaves washed and dried
Moringa leaves washed and dried

Moringa leaves mixed with shredded coconut


Puttu stir-fried in the simple steamer with moringa leaves. Mix crumbled wheat flour,coconut and moringa leaves.and steam as said above.
Moringa pittu in the steamer
                                                            Moringa pittu in the steamer

Steamed moringa pittu


                                                             Moringa leaves puttu using the steamer with barrel

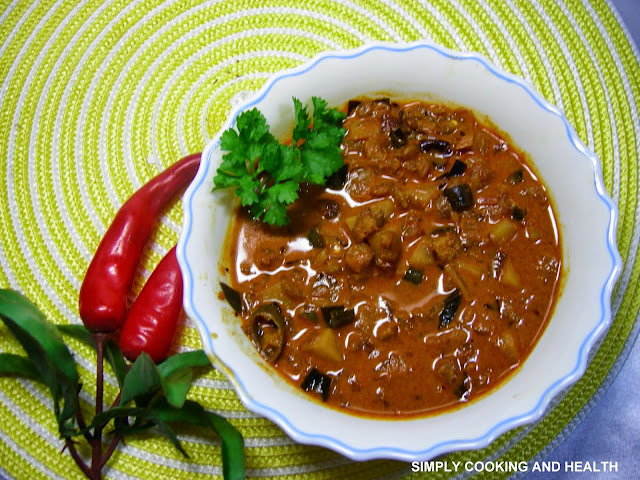
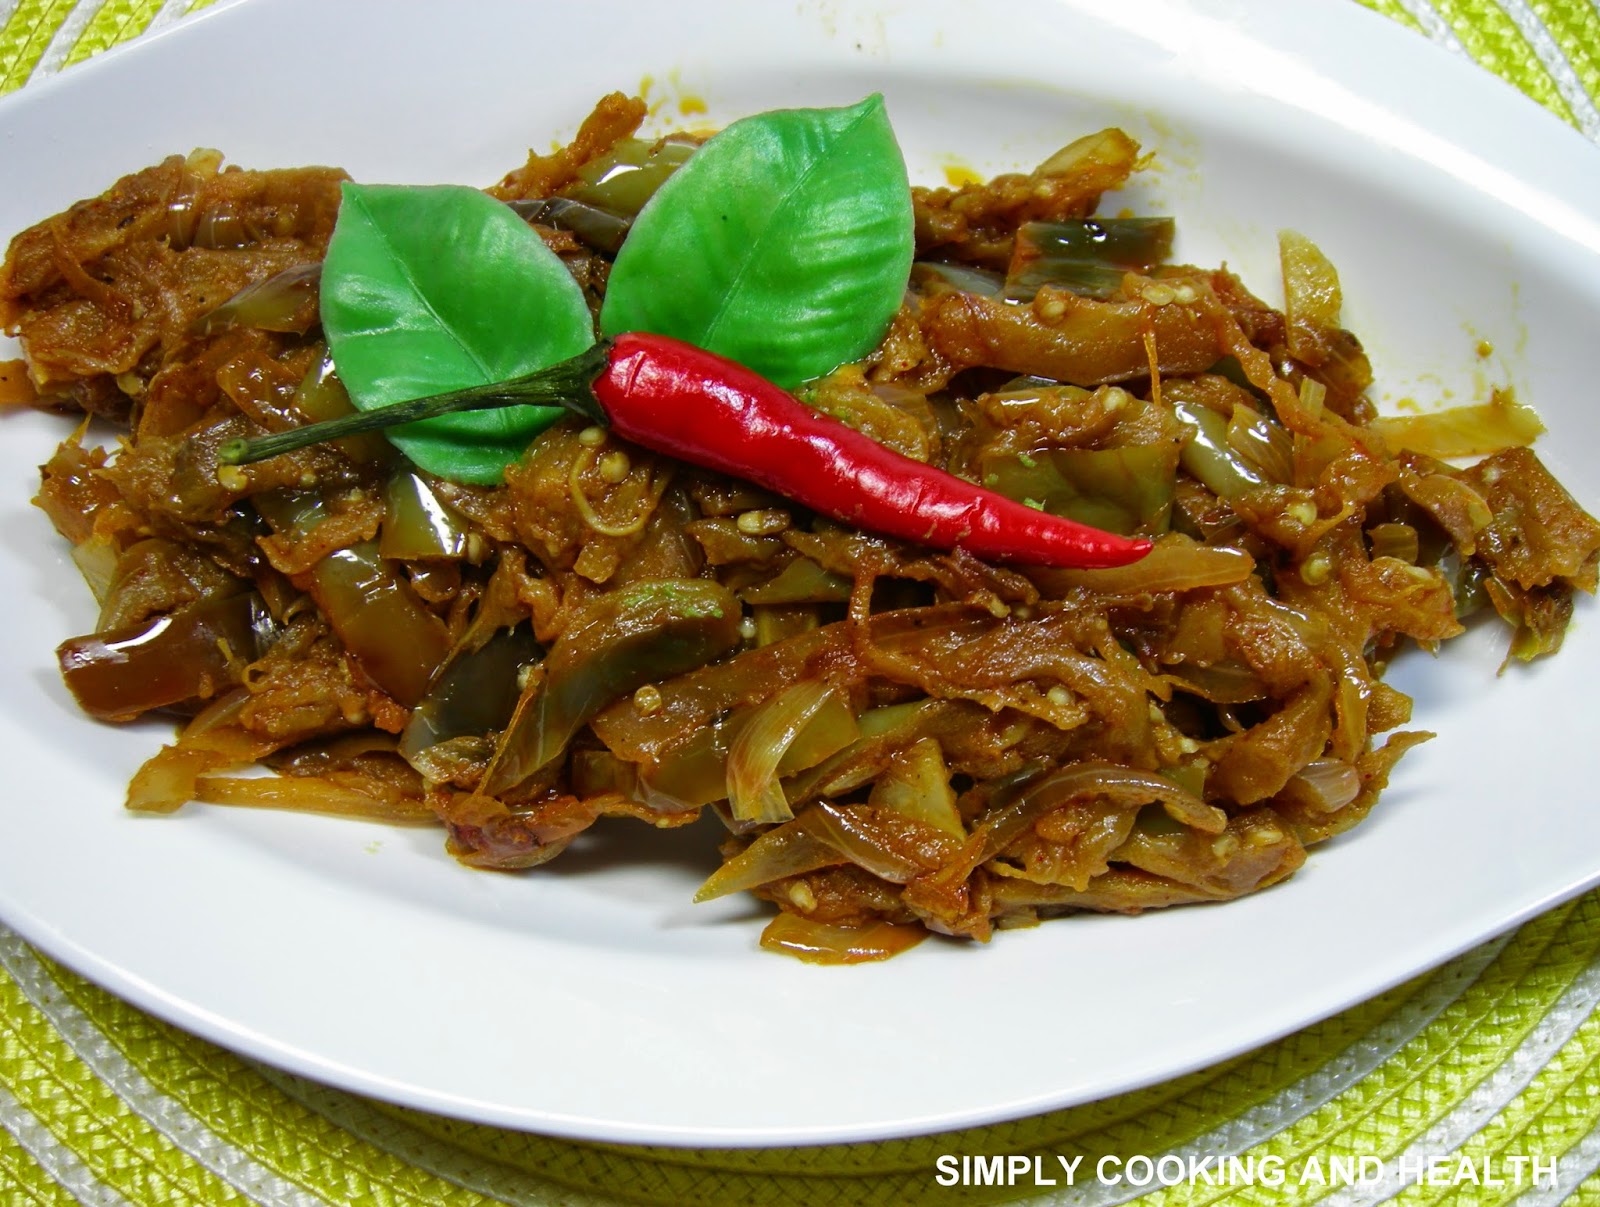
Scrambled flour with eggplant spicy soft fry,spicy prawn gravy and  curry leaves sauce
Scrambled flour with eggplant spicy and soft fryspicy prawn gravy and curry leaves sauce

Puttu is vegetarian. Accompaniment  prawn gravy can be changed to a vegetarian gravy.

YOU MAY LIKE TO SEE THESE RECIPES OF MINE

Final curry leaves sauce
curry leaves sauce

Spicy prawn gravy
Spicy prawn gravy

Eggplant spicy and soft fry


Steaming all-purpose flour

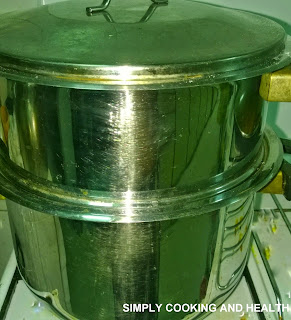
Stemer
steamer

Steaming flour at atmospheric pressure for 15 minutes will denature the gluten and  reduces the water absorbing capacity from 58.4% to 45.0%.
Steaming of all purpose flour increases the viscosity of batter. Batter made with steamed flour for coating and deep frying results in overall improvement in quality and texture of the finished product. Steamed flour is used in making some Indian snacks and sweets. 
Steamed flour has the following characteristics:
  • mixes well with water without forming lumps
  • high water uptake
  • consistent flow characteristics
  • no enzyme activity resulting in loss of viscosity
  • no water separation while standing
  • lower microbial load
If you add plain water or warm water to all purpose flour it will become a kind of glue. So we cannot make dough with just all purpose flour and plain water. If we steam or roast the all purpose flour we can make a usable dough just with plain water. Generally roasting is easier than steaming.


Today I am going to steam the flour. 


                                 Recipe summary
                                           For
                           Steaming all-purpose flour

Preparation time : 15 minutes

Cooking time : 45 minutes

  1) First sift the flour. This will aerate the flour and remove any unwanted materials. 
Sifting the flour
Sifting the flour


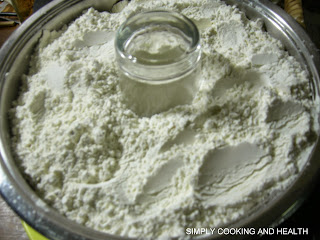
 2) Then place a drinking glass in the centre of a steamer and then put the flour in the streamer around the glass. 

Place a glass and add sifted flour
Place a glass 
and add sifted flour


Do not compact it but leave it as fluffy as possible so that steam will pass through it easily.
Now all the flour has been added to the steamer


Now all the flour has
 been added to the steamer

When all the flour has been added to the steamer, remove the glass before steaming and the centre hole provides space for the steam to penetrate the flour.


Steamer if filled with flour and glass removed
Steamer if filled with flour 
and the glass removed


3) When  you remove the glass hold the top part of the glass and shake it round a little and remove so that the flour does not fall in the center space.


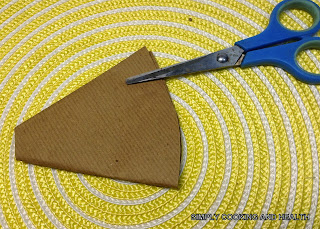
4) When you cover and steam the flour the steam will condense on the lid or cover and fall into the flour and make a mess of it. So cover the flour with a paper with a center hole so that the condensed water will be absorbed by the paper. Today I am going to use a clean brown paper. You can use any kind of absorbent paper like news paper. If you have it is better to use a plain paper. Fold and cut the paper according to the size of your steamer. 

 Fold a paper into half and then make a second fold and then again a third fold. Now you can make a small cut at the  top to make a centre hole. We cut in the centre to expose the opening when we remove the glass. Lastly you can make a cut at the bottom of the paper according to the size of your steamer. 
Make a cut at the top
Make a cut at the top.


5) Cover the flour in the steamer with the cut paper. Then place the lid on and steam.
Cut in the centre to expose the opening when we remove the glass
Cut in the centre to expose the
 opening when we remove the glass.


Glass removed. The paper covers the flour but exposes the center hole
Glass removed. The paper covers the 
flour but exposes the center hole

6) Boil the water in the bottom pan of the steamer. When the steam begins to come out of the pan place the upper part of the steamer on the pan. (There must be some interval between the upper part of the pan and water in the bottom pan.) Let it steam for 45 minutes. In between see that there is enough water in the bottom pan. If it is not enough add hot water.

7) Then take the steamer off the heat. When you open the lid the paper will  be lightly wet with the condensed water.
After steaming. Notice the condensed water collected by the paper
After steaming. Notice the condensed
 water collected by the paper

8) Remove the brown paper from the steamer. It will be lightly wet with the condensed water. Some water would have seeped into the flour. Scoop the wet flour with a spoon and discard. The wastage is negligible.


Now the paper is removed. There is some water on the top. Carefully remove the wet flour and discard

9) Then turn the steamer upside down to remove the steamed flour from the steamer. The flour will be slightly hard.
After removing the tainted flour

10) Crumble it with a roller pin while it is still hot. It will be more difficult to crumble it after cooling.
While hot break the lumps with a rolling pin

11) Sift the flour to aerate the flour. You can use this flour immediately or store in the refrigerator for later use to avoid developing mold and weevil. During the second sifting there will be some flour that will not go through. Discard it.

Another alternative is to  tie the sifted flour in an old piece of cloth and steam.
When you use this method washing the cloth after use is difficult.

 
Steaming all-purpose flour  is ready .                    
                  Recipe follows in detail with pictures.


Preparation time : 15 minutes
Cooking time : 45 minutes

1) First I will sift the flour. This will aerate the flour and remove any unwanted materials. 


Sifting the flour
Sifting the flour


Sifted all-purpose flour flour
Sifted all-purpose flour


2) Then I will put a drinking glass in the centre of a steamer and then put the flour in the streamer around the glass. I will not compact it but leave it as fluffy as possible so that steam will pass through it easily.


Place a glass and add sifted flour


Now all the flour has been added to the steamer

 I will remove the glass before steaming and the centre hole provides space for the steam to penetrate the flour.


3) I will then remove the glass. When  you remove the hold the top part of the glass and shake it round a little and remove so that the flour does not fall in the center space.

Steamer if filled with flour and glass removed
Steamer if filled with flour and the glass removed

4) When you cover and steam the flour the steam will condense on the lid or cover and fall into the flour and make a mess of it. So I will cover the flour with a paper with a center hole so that the condensed water will be absorbed by the paper. Today I am going to use a clean brown paper. You can use any kind of absorbent paper like news paper. If you have it is better to use a plain paper. Fold and cut the paper according to the size of your steamer. 


Fold a paper like to cover the flour to prevent condensing water dripping on the flour
Fold a paper like this to cover the flour to prevent condensing water dripping on the flour.


Make a cut at the top
Make a cut at the top.


Cut in the centre to expose the opening when we remove the glass
Cut in the centre to expose the opening when we remove the glass.

5)Cover the flour in the steamer with the cut paper. Then I will put the lid on and steam.


Glass removed. The paper covers the flour but exposes the center hole
Glass removed. The paper covers the flour but exposes the center hole


6) I will then boil the water in the bottom pan of the steamer. When the steam begins to come out of the pan I will put upper part of the steamer on the pan. There must be some interval between the upper part of the pan and water in the bottom pan.I will let it steam for 45 minutes. In between see that there is enough water in the bottom pan.If it is not enough add hot water.

7) Then I will take the steamer off the heat. When you open the lid the paper will  be lightly wet with the condensed water.

After steaming. Notice the condensed water collected by the paper
After steaming. Notice the condensed water collected by the paper
8) I will remove the brown paper from the steamer. It will be lightly wet with the condensed water. Some water would have seeped into the flour as you can see from the right and left top in the picture here. I will scoop the wet flour with a spoon and discard. The wastage is negligible.
Now the paper is removed. There is some water on the top. Carefully remove the wet flour and discard
9) Then I will turn the steamer upside down to remove the steamed flour from the steamer. If it is sticky a sharp blow to the bottom of the steamer will release the flour from the steamer. The flour will be slightly hard.
After removing the tainted flour

10) I will crumble it with a roller pin while it is still hot. It will be more difficult to crumble it after cooling.

While hot break the lumps with a rolling pin

11)I will sift the flour again to aerate the flour. I can use this flour immediately or store in the refrigerator for later use. When we don't keep in the refrigerator it will develop mould and weevil.

During the second sifting there will be some flour that will not go through. Discard it.

Another alternative is to put the flour and the steamer in a large wok and cover it with a larger loose lid. Then the condensed steam will fall outside the steamer top. But this will mean you will have to replenish the water in the wok a few times before the flour is fully steamed. That is why I prefer to use the lid that comes with the steamer.


Another alternative is to  tie the sifted flour in a white kitchen towel or old piece of cloth and steam.
When you use this method washing the cloth after use is difficult.

I made pittu with moringa leaves from the steamed flour.
Pittu with moringa leaves
                                                     Pittu with moringa leaves